Home / Workshop / Workshop · Punctures
Workshop · Punctures · · 8 min readFixing a puncture: inner tube versus tubeless
Both systems fail. Both can be mended on the kitchen floor. Here is what a workshop would actually do.
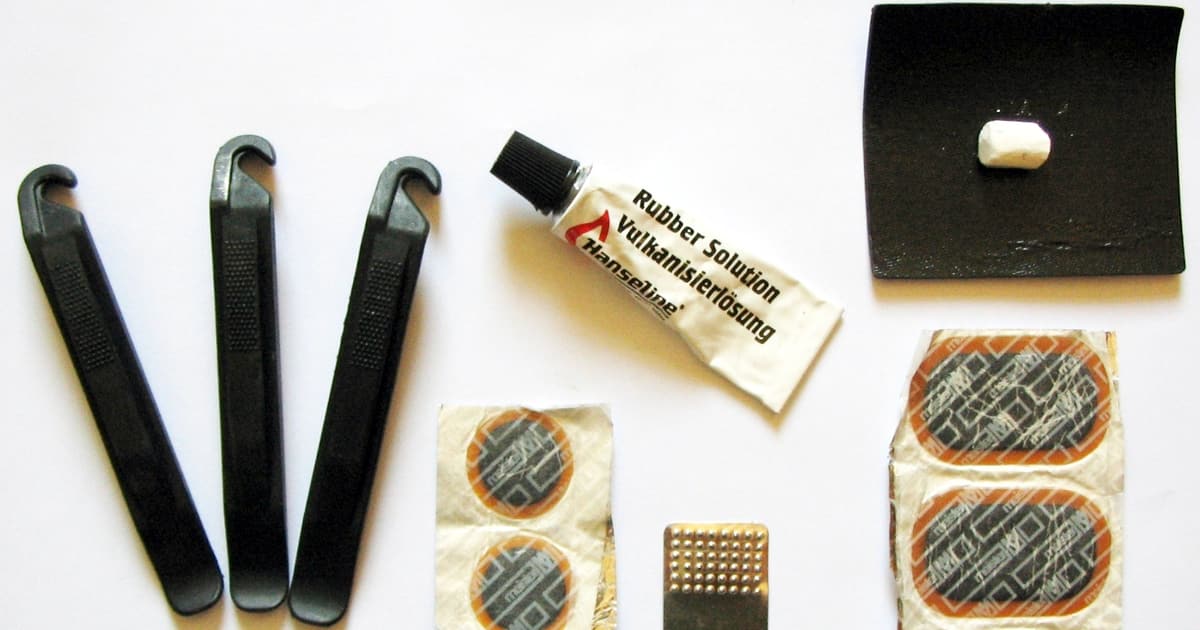
Photo: Björn Appel, CC BY-SA 3.0, via Wikimedia Commons.

A puncture is not a catastrophe. It is an afternoon in the kitchen with a bucket, three tyre levers and the patience to find the hole properly before you plaster over it. The newer bike, the smug one with no inner tube, still punctures. It just lies about it for longer.
This piece is how we would mend both, step by step, with the arguments laid out. It is not a sermon on which system is best. Both work. Both fail. The repair is where the difference shows up.
What you actually need on the floor
You do not need a special kit sold at airport prices. For an inner tube you need: two or three tyre levers that do not snap, a small roll of patches (vulcanising ones, not the "glueless" discs), a tube of rubber solution, a piece of sandpaper or scuff, a bucket of water with washing-up liquid in it and a working pump.
For tubeless you need: a plug kit with proper rubber-and-fabric strips and an insertion tool, latex sealant in a bottle that is not two years old, a valve core remover (many caps hide one), and either a track pump with a reservoir, a CO2 inflator, or compressor access. A bowl of soapy water is still useful for finding leaks.
Inner tube: the method that keeps working
Deflate the tube fully by pressing the valve. If it is a Presta valve, undo the lock ring first. Push the bead of the tyre away from the rim with your thumbs all the way round. It will not go straight away, especially on a new tyre fitted in July. Hook a lever under the bead, prise it over the rim and hook its other end on a spoke. Work the second lever six inches along until the bead pops over. The third is often not needed.
Pull the tube out, keeping the valve roughly where it sat so you can line up the tyre later. Pump the tube up until it is flabby and bulging, hold it near your ear, and listen. If you cannot hear it, run it slowly through a bowl of soapy water. The bubble stream shows you the hole.
Why you find the hole before you check the tyre
Line the inflated tube back along the tyre with the valve at the valve hole. The leak tells you where in the tyre to look. Run your bare finger or a wad of tissue around the inside of the tyre, inch by inch. Anything that has pierced the tube is usually still in the tyre, invisible from the outside. Pull it out with pliers. Skip this and the new tube goes down inside an hour.
Patching, properly
Dry the tube around the hole. Rough up a patch-sized area with the scuff, not just a scratch. Squeeze a thin layer of rubber solution out, larger than the patch. Spread it with a clean finger or the glue tube's own nozzle. Then wait. The solution has to go from shiny to matt and tacky. This is the step almost everyone shortens; it is also the step that determines whether the patch is still there in six months.
Peel the foil off the patch, press it on hard, and rub it with the back of a spoon or lever for a good minute. Leave the thin plastic film on top; it will crack off on its own. Inflate the tube to check, let it down, and fit it back inside. Seat the valve straight, push the bead back over the rim by hand where you can, and finish with a lever only if you must. A thumb pressed in the wrong place pinches the new tube against the rim, and you will be on the floor again.
Tubeless: the one-minute fix that works, and when it does not
A small puncture in a tubeless tyre is ideally fixed by the sealant itself, before you notice. If it does not seal and you can hear the hiss, find the hole, rotate it to about four o'clock, spin the wheel so sealant gathers there, and stop. For anything bigger than a thorn, use a plug.
Push a sticky rubber strip through the insertion tool, poke it halfway into the hole, and pull the tool out, leaving the strip. Trim the ends with scissors flush with the tyre, never cut it short enough that it is level with the rubber. Spin the wheel, check it holds, re-inflate. On most road and gravel tyres you can ride home on a plug alone.
The sealant question nobody wants to ask
Sealant dries up. In a cool British garage it lasts two or three months longer than the back of the bottle claims; in a hot one, less. If you have not topped yours up since spring, your "self-sealing" tyre is a slow inner tube with latex pancakes in it. Pop the valve core out with the little tool, pour 30 to 60 ml through the valve depending on tyre size, re-seat, re-inflate, spin.
If you want the honest comparison: tubeless gets you through small thorns without stopping, especially on mixed-surface rides. It also takes a cupboard full of bits and a bit of ritual every couple of months. Inner tubes are grubby to mend, cheap to replace and need no maintenance between flats. Both are fine. Pick the pain you prefer.
A note on CO2 canisters
A single CO2 cartridge gets you home but turns to nothing in a few days through the tyre casing and sealant. Pump it up properly with a track pump at home that night. Also: do not fire a cartridge near your face. It is a useful emergency tool, not a miracle one.
If you have never done this before
Practise once in daylight, in your kitchen, on a wheel off the bike. It is a different job in the rain with cold hands on a verge near Didcot. A free refresher from Cycling UK or a local Bikeability instructor is worth more than the cost of another new tube.
Once you have fixed one, you own the bike again. If you also want to know when a chain is finally done, we wrote a short piece on chain wear that uses an ordinary steel ruler.
Find the hole before you fix the tyre. Not the other way around.
Safety: do not chase down a car to shout at the driver who put glass on the road, however much you want to. Mend the puncture, swear quietly, ride home.
About these pieces. Cranky Bikes is written by the editors and is not affiliated with any other site of a similar name. We do not sell bikes. We do not accept payment for links or coverage. If you spot something wrong, write to [email protected].